Products
Design Specs
Info


Products
Design Specs
Info
Bleeds
When working with customers, we try and
explain what we need in order to create a bleed
(image goes to the edge of a paper), however
we still don't always get what we nee.
The following pictures is going to show you how
we create a bleed in the printing world.
Hopefully this will help in understanding how we
need to receive a file in order to produce the
printed piece as you want it
The image to the right is what the finished piece
should look like.
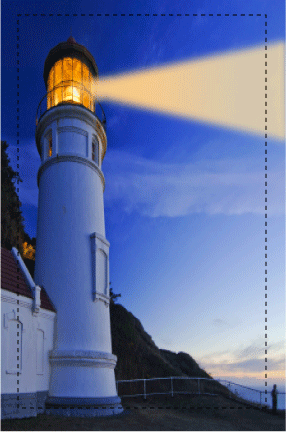
Can't Print to the Edge
We are unable to print an image to the edge of
a sheet of paper. To solve this problem, we
print on a larger sheet of paper and then trim
back to the image.
We are unable to print an image to the edge of
a sheet of paper. To solve this problem, we
print on a larger sheet of paper and then trim
back to the image.
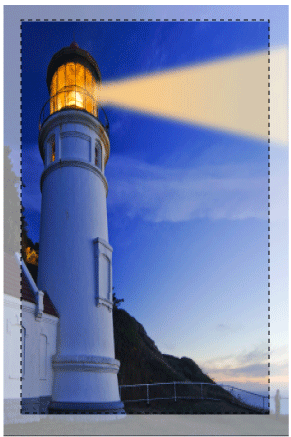
Can't Cut to the Edge of the Image
Our next issue is we cannot precisely cut at the
point where the image ends and blank paper
starts. To overcome this issue, we ask that you
supply us with a larger image size so when we
make our cut, we are guaranteed not to have
any white Space. The second picture shows the
larger image. The third picture shows the area
that is trimmed off to leave the finished full bleed
image.
So that is why we ask for an image that is 1/4"
bigger than the finished size.
| Copyright © 2012 |
| CWH Graphics will appear on your credit card bill. |
Full Color Printed
Products
Products

| We go Great Lengths To Print your Short Runs |